Quick Tutorial for Harvesting Cannabis

6 de may. de 2025 — Luis Paz

For decades now, Mays in Argentina have smelled like harvest. With the home-growing boom and permits allowing medical patients to have their plants in a regulated way thanks to the Reprocann program, the "weed smell" has been growing stronger and stronger across Argentina. The latest breezes have been carrying those gorgeous, heavy aromas from neighboring patios, from plants bursting with buds ready to harvest. You walk down the sidewalk and from a half-open window comes a plume loaded with promise, with the smoke of freshly cut weed, still carrying that vegetal aftertaste and that resin-coated thickness that makes you inhale at full capacity, like slurping the last drops from a juice box at recess.
In the coming weeks and months, the soccer fields, the dive bars for bands, the clubs, and the plazas across the country will fill with the exotic and intoxicating perfumes of the finest flowers this season has to offer. The first growing season that 421 has followed from the very beginning: back in September, when the site launched, Juan published this incredibly thorough outdoor growing guide (for people who don't know how to take care of plants). But to reach the culmination of this process, we now face the defining threshold: it's time to cut, to dry, to jar, and to cure. This is a critical moment for every joint of tomorrow. You can't mess around.
You decide the harvest point (but take a few tips)
Every experienced grower will tell you the same thing: you decide when to cut. If you have absolutely no idea, let me start here: statistically, you should be cutting around these days in May, first half. Some people let their plants mature well into May, even June: they're after something very specific, but they're the minority and it's tough work, because they're exposed to cold rains, consecutive sunless days, and mold.
On the other hand, there's an overwhelming number of people who cut too early, wasting half a year's work because they couldn't hold out a few more weeks. Sometimes a storm forces your hand, or the available space is too tight. Aside from those cases, every extra day you can hold off to bring your plant to its ideal point will be rewarded in experience and in grams.
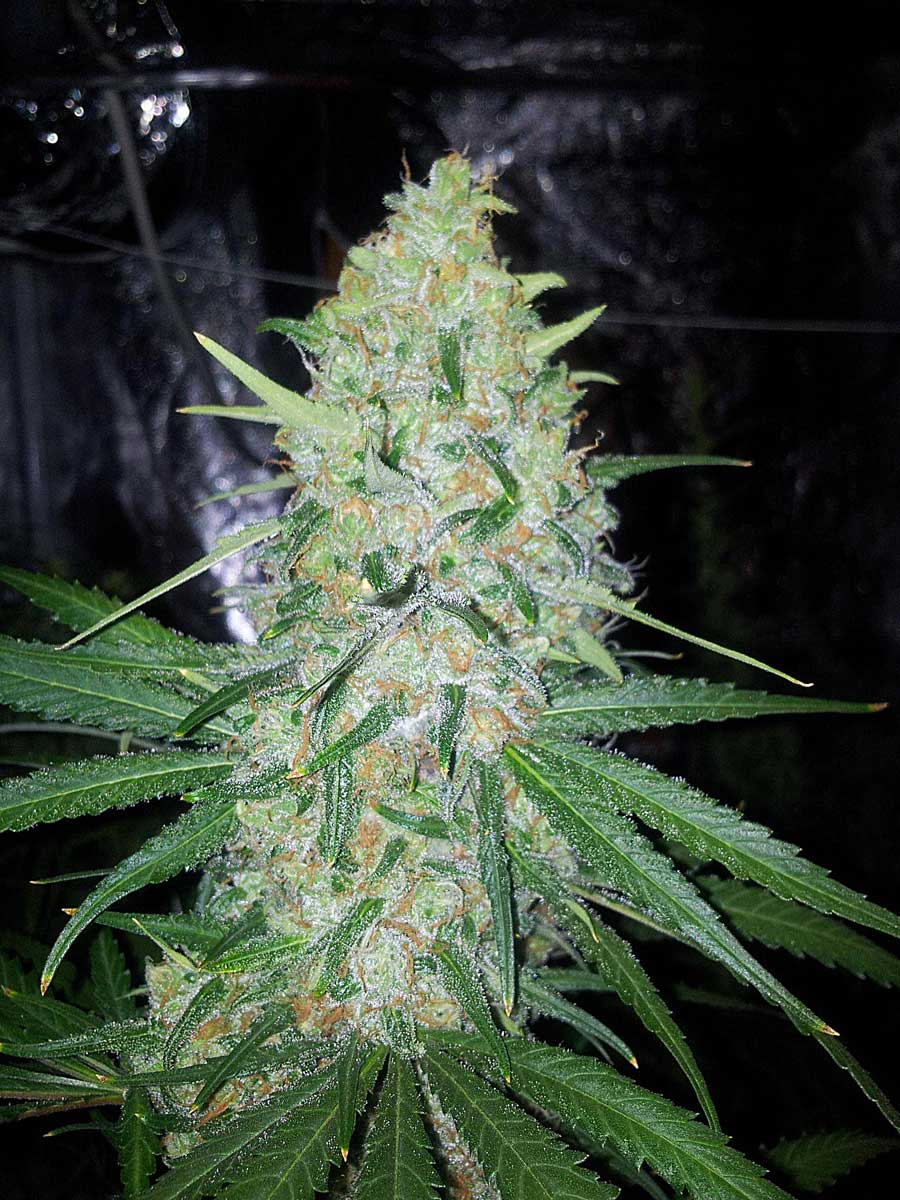
The cannabis plant grows from a central stalk and in its wild state takes the shape of a small pine tree. Growers often make a series of cuts to the stalk and shoots to multiply the number of main branches and, therefore, the number of bud tops, the "prime cuts" of the marijuana plant (the photo above, yes). The tree sprouts branches, smaller branches, and leaves. At the tip of each branch and sub-branch, and at the nodes where those shoots emerge, the buds appear -- the flowers -- sitting on a bed of fine leaves. The flowers keep expanding as leaves, calyxes, and pistils grow, becoming increasingly dense on the inside. The ideal bud is compact; it doesn't give when you gently squeeze it. As long as the tips of your branches look easily squishable, don't even bother thinking about cutting.
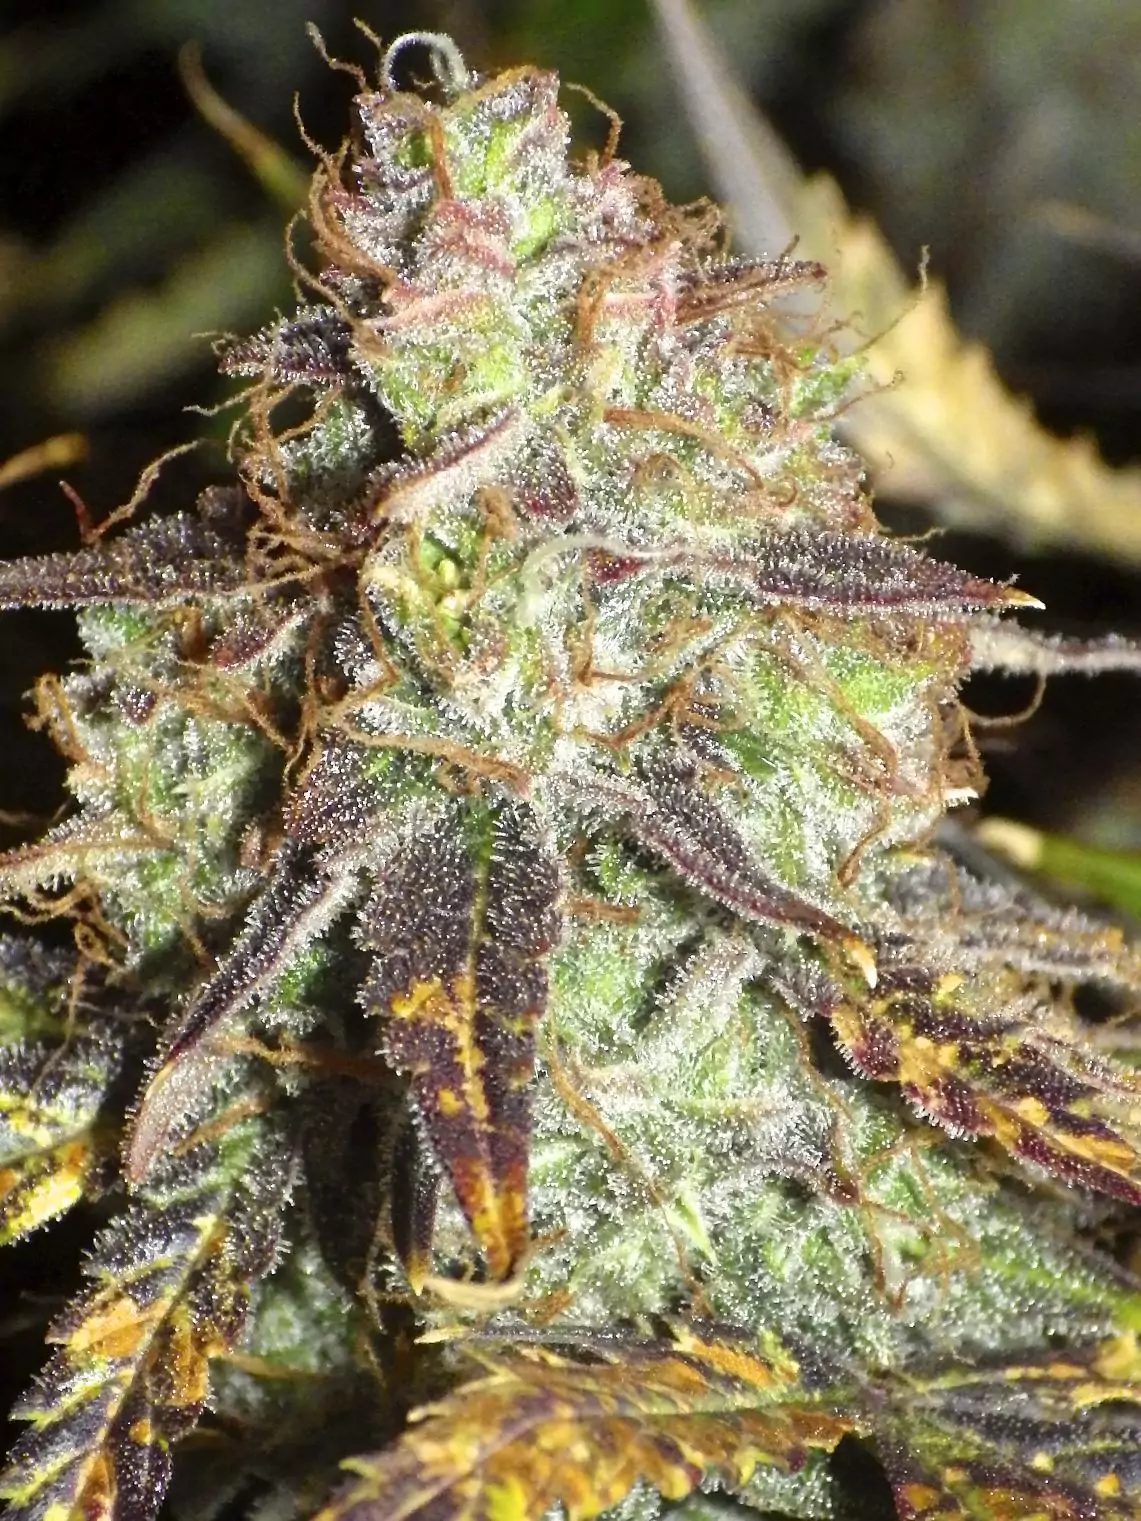
There are many techniques for identifying the harvest point, but there's a consensus around certain "visual inspection" techniques so precise that they form something like a canon. What should you look for? The level of frost, for starters: the proliferation of crystals, of resin, of that fine drizzle that when you look at it under the moonlight makes your plant look like a snow-covered Christmas tree. Then, up closer, you need to check the swelling of the calyxes and the smallest leaves, which intertwine with the flowers in the final days. And the darkening of the pistils, along with a slowdown in the emergence of new ones. When every part of the plant you've been watching day after day looks plump and glittery, that's when the flower is truly ripening. Only then do you start thinking about cutting.
Differences based on when you harvest
The choice lies in how long you wait after the plant reaches its mature point. And you can actually play around with that quite a bit, because sizable trees tend to have several waves of flowers at different stages of development, so you can do partial harvests until the cycle is complete.
In general, the rule of thumb is that cutting in the early window of maturation gives you weed with lower therapeutic effectiveness, a shorter high, and a less balanced flavor and aroma experience that often can't be improved during curing. The upside is getting your flower fast, and not much else. Although for heavy users, it's nice to have some quick bud whose effects fade fast and don't create much mental fog. A happy little smoke.
Conversely, delaying the cut until the flowers are well into advanced maturation gives you a heavier, more narcotic and analgesic weed that stimulates sleep and stillness more. With deeper flavors and aromas too. This opens the door to another range of more mature, aged experiences, where the weed enters a gourmet and even boutique segment. The risks lean toward pests, mold, and going overboard so that gatherings seasoned with your harvest turn somber.
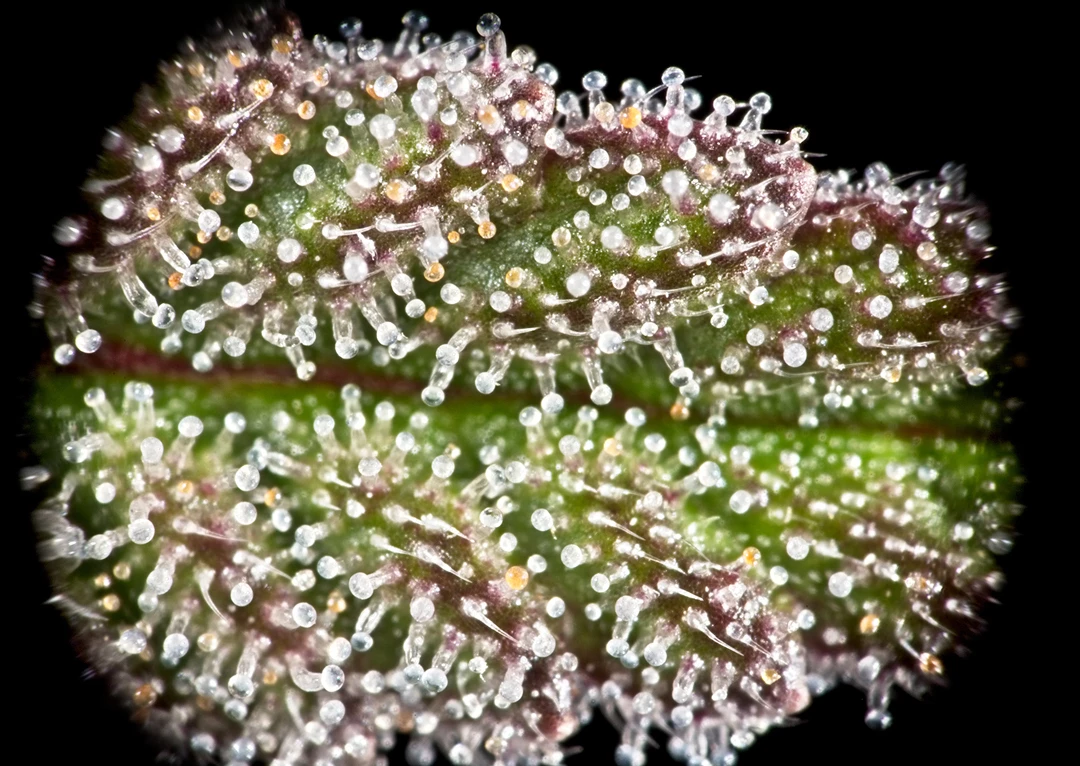
So what's the exact, super exact, absolutely precise point? I'm going to let you down because there isn't one either, but if you buy a 60x loupe (they start at about 20,000 pesos) you can do a microscopic analysis of the flowers. You'll see them like in the photo above and get to know the trichomes in person -- those bulbous-tipped stalks that, among other functions, will give you another layer of understanding about the maturity of your plants.
The pistils start out transparent, and until almost all of those bulbous heads have turned opaque, milky in color, it's still too early. Only when they collectively look whitish and several are starting to turn brown does the harvest point approach. The canon states that a ratio of 70% milky and 30% brown marks the perfectly balanced physico-chemical point of the weed.
Process for cutting your plants
Once you've reached the harvest point, your plants' buds need to be exposed, either because many leaves yellowed and fell, or because you had the discipline of progressively defoliating the plant to improve air circulation and light penetration. That should also help you access the nodes where branches emerge from the main stalk.
Start by cutting at those nodes (with a handsaw, small saw, or pruning shears), working branch by branch. Some recommend doing it at night and others suggest doing it right at dawn, when plants also tend to concentrate their peak terpene activity, which is what gives them flavor and aroma. I like the second idea better, but here's the thing: cannabis cultivation is an iterative process where each year -- or every few months, if you grow indoors -- you understand the plant and its processes better, and you get to know yourself better as a grower and especially as a user, taking note of your own needs and possibilities.

Cutting the branches
Each main branch will be segmented depending on the space you have available for drying: an empty grow tent, a spare room, an old closet, a cardboard box you brought from the corner store. That will give you a sense of how much room you have and how long the branches can be -- ideally, you want to hang them vertically. With pruning shears or stainless steel scissors, cut the branch into smaller sections -- 20/30-centimeter pieces can be hung anywhere, but you have no idea how satisfying it is to hang a big branch a meter long or more -- which will also help you with the next step.
The final defoliation
Before moving on to a fine trim or "manicure," you need to remove all the large fan leaves that survived until this point -- any leaf without trichomes, out. The goal is to minimize the plant matter as much as possible, thereby increasing the flower density. For this job you'll need pointed stainless steel scissors and ideally gloves, because you'll be handling the buds and you don't want to dirty, grease up, or moisten them.
The manicure aka deep trim
There are two schools of thought, depending on whether the fine trim is done dry or wet -- that is, after an initial drying of the plants and before curing, or right at the time of cutting. The advantage of an immediate trim is that it controls moisture from the very start, but it has to be done instantly or within minutes of cutting a branch, because after that the leaves start wilting and drooping over the buds, making the job harder. Dry trimming is easier, because the non-resinous leaves have shriveled up and can be quickly removed even without scissors, while those more coated in trichomes hold their shape and end up adhering to the flowers. But with dry trimming, that initial drying happens at a less favorable flower-to-leaf ratio than with wet trimming.
Either way, the goal is -- if you can afford the luxury -- to make sure every little leaf tip poking out from the bud's natural shape gets removed. Cutting the leaves flush with the flower is sufficient and helps tremendously in every aspect of the final result. There are also people who go in with extra-long, ultra-fine-tipped scissors to achieve a 90% pure flower -- a perfect bud is impossible -- but that means a whole lot of extra hours that most people simply don't have.
Everything related to drying, curing, and storing the fruit of all this work deserves a guide of its own, but we can't wrap up this quick harvesting tutorial without going over some general concepts.
Drying and the jarring point
The ideal conditions for drying cannabis are temperatures between 18 and 21 degrees Celsius, with a relative humidity between 50% and 60%. Higher heat and lower humidity can lead to overly fast drying that damages the characteristics of your cannabis, in terms of both smell and flavor as well as effects. After trimming, the branches are usually hung upside down in dark, ventilated spaces: it could be a room with an ambient hygrometer and adjustable ventilation, a closet whose doors you crack open for a while every day, or simply a large cardboard box with some wire or string running through it so the branches hang suspended. Between 7 and 10 days of drying under those conditions is usually enough. The indicator is a classic one too: when the thin stems snap when you bend them, but the buds are still a little "flexible."
Curing and storage
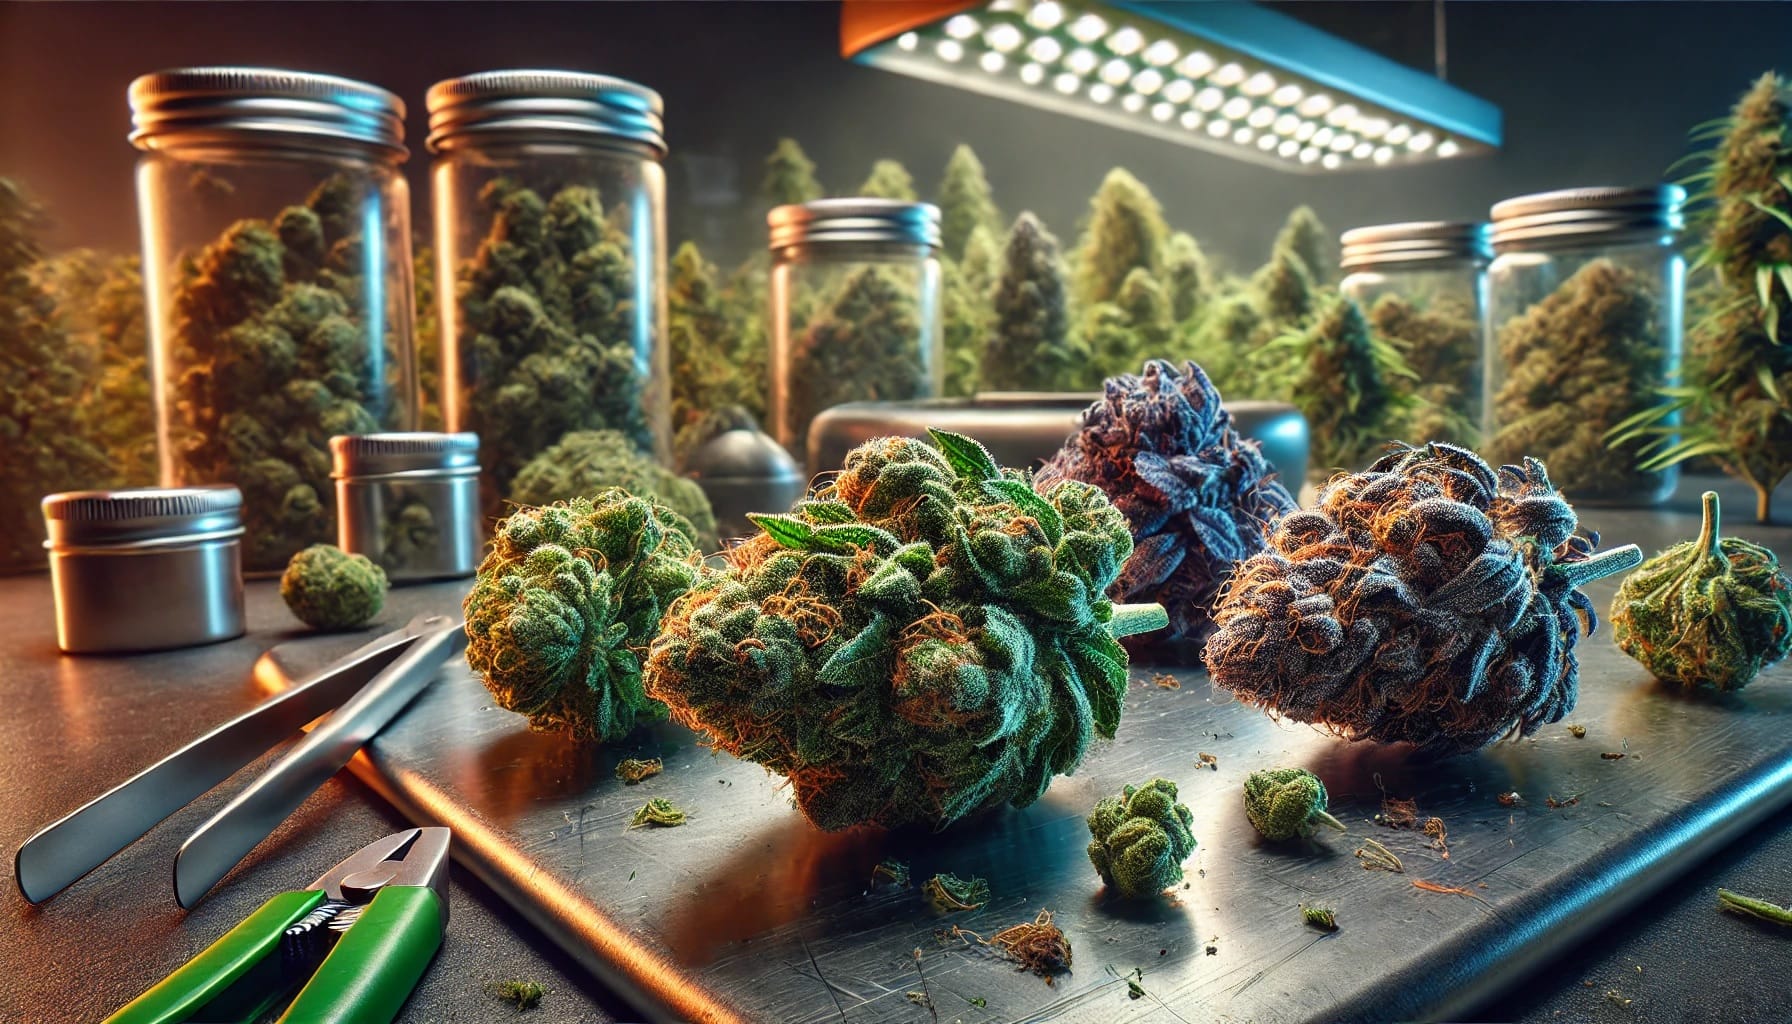
The most common way to store buds is in glass jars, ideally airtight. Any jam or coffee jar can do the job, though imperfectly. In any case, once dry, the buds are separated from the branches with a cut and placed in jars, filling 2/3 of the container's capacity. That remaining space is key to preventing crowding, compaction, and mold growth. It also allows you to see most of the contents and notice if something's off (a dead bug that got stuck among the buds, a spider that crept in during drying, mold sprouting in the middle of the jar). Those containers get one or two daily airings of about 15 minutes, which serves to refresh the air and release accumulated moisture.
At this point, you can add humidity packs like Boveda, which help regulate the relative humidity inside the jars at levels like 58 or 62%; there are also calibratable desiccant tubes. A month of curing is a standard measure, but those who can afford the luxury of 6 or even 8 weeks of curing will unlock fully developed flavor, aroma, and effect profiles. From that point on, the jars can remain permanently sealed until needed. Still, constant cleanliness is essential, with very careful mold checks: any suspicious bud must be discarded immediately, because the greed for two more joints can ruin a 50-gram batch just like that. The jars should then go in a dark, cool place (by this point it'll be winter, so no worries there), labeled with the harvested variety and the date, until the occasion comes to crack them open.