An Outdoor Cannabis Growing Guide for People Who Can't Keep Plants Alive
An Outdoor Cannabis Growing Guide for People Who Can't Keep Plants Alive
This is a (not so) brief introduction to outdoor cannabis growing: patio, balcony, terrace, garden. It's a summary of my experience over the more than twelve years I've been growing the plant on and off. My first grow was in the summer of 2011-2012 and the last one in 2023-2024, and although I had some gaps in between, that gave me a good number of plants grown. The idea behind this Guide is to accompany those who want to start their first outdoor grows, giving them the necessary information without being overwhelming.
Starting the task of growing from scratch can be a bit confusing, given the number of variables involved. But basically there are a series of essential aspects to any outdoor grow: genetics, light, substrate, watering, and fertilizers. All while keeping in mind that, many times, the biggest challenge for most growers is taking care of a living being for the first time in their lives.
The holistic approach
There's something key that always gets left out of growing guides, and it's that most people who get into growing marijuana start from a total lack of knowledge about how to care for a plant. Ultimately, growing marijuana is a subgenre of caring for a plant, so all gardening knowledge is extremely valuable for growing marijuana. Any reasonably good gardener can do it without a problem. What you need to understand is that taking care of a plant is a "holistic" activity; that is, it incorporates many other activities with intertwined relationships. A plant is an interdependent organism, and that's why, while you need to look at specific things, you also need to develop a general level of analysis.
Many factors contribute to the whole. How do you know if things are going well? The plant should look healthy: good size, good growth rate, nice green leaves, and few bugs lurking around. How do you know if things are going badly? Strange size, low growth rate, yellowish leaves, poor overall condition. Learning to read the signs of the plants is learning to grow. Understanding the general processes of plants and how they are affected by our actions is the main thing to develop as a grower or gardener.
And while in this Guide we want to give recommendations that don't take up too much time, nothing good comes without work. Taking care of a plant involves a certain level of effort, and the better we do it, the better the result. There's no way around it: caring for a plant or a garden is a daily job. If you're not willing to dedicate that amount of time, better find another activity.
This Guide aims to optimize the balance of time, work, and results obtained. To achieve the best we can with the minimum effort required. But something has to be done. There are no shortcuts.
Marijuana
Let's first recall some basic information about cannabis. The marijuana plant is a sexed plant, and we'll be growing females, which are the ones that produce flowers and receive pollen to reproduce by creating seeds. In these flowers, the crystals (trichomes) are produced, which contain psychoactive compounds like delta-9 THC (better known simply as THC), and other less well-known ones like CBD.
These plants respond to photoperiods — their growth is determined by the number of hours of light they receive. A plant that receives more than 12 hours of daily light (ideally 18) will maintain vegetative growth, where branches, leaves, and stems grow without producing flowers. When the hours of darkness and light become equal (12-12), the plant enters flowering. That is, it starts producing buds. The well-known "autoflowering" varieties don't follow this pattern and flower under any light conditions, once they reach a predetermined maturity point.
Genetics
Genetics is the key factor in any grow. While the environment (light, substrate, watering, and fertilization) contributes to the good development of a plant, its greatest potential lies in its genetics. There's a lot to unpack here, but basically, if you're going to germinate from seeds, make sure they're original, from a reputable seed bank. That guarantees (within the range that exists among living organisms) that the chosen plant will have the best genetic conditions to develop. And if you're going to buy clones, make sure they're good ones. Everything else is a matter of taste.
My biggest piece of advice is to get feminized seeds or clones from female plants. There's no bigger frustration than dedicating lots of time, love, and money to a plant that turns out to be male. While it's within the realm of possibilities, it's better to minimize the risk.
On the other hand, plants with proven genetic characteristics from reliable seed banks tend to grow much better, are healthier, and yield more during flowering. When I started growing, the only way was to bring seeds from abroad, especially from Spain. Today there's already a wide variety of local seed banks and resellers that can provide the necessary genetic material. But don't be fooled — go with the originals.
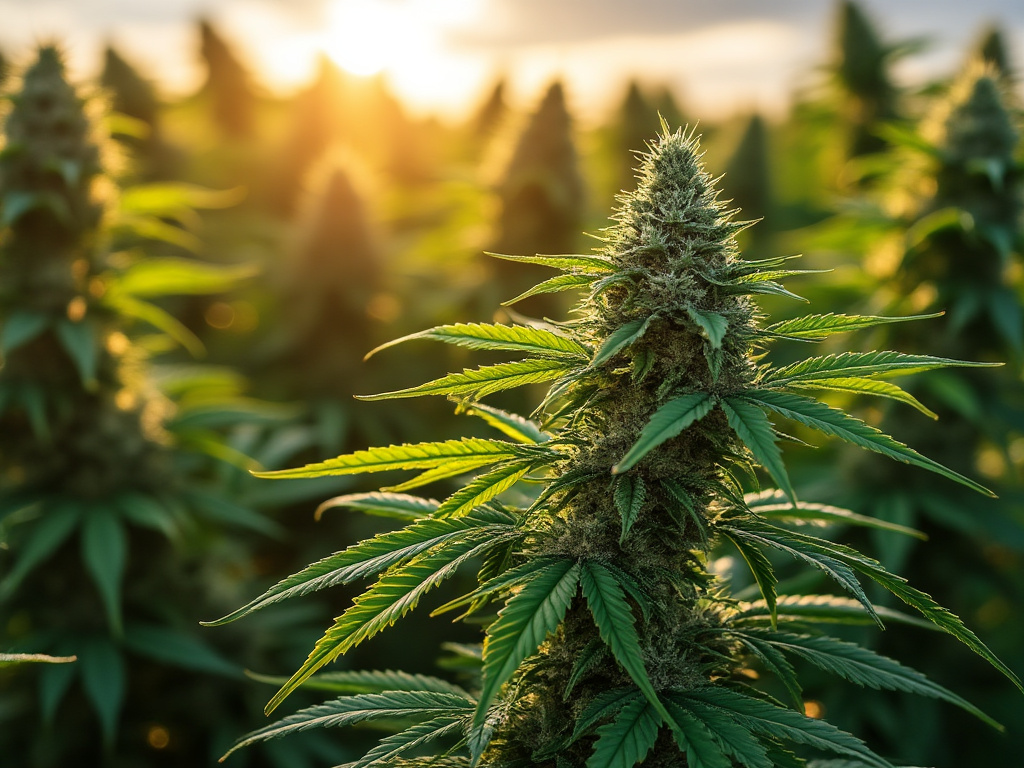
Light
Light is the first environmental factor to consider when doing an outdoor grow. Because the amount of direct light your plant gets will determine its growth, and those that don't receive enough will tend to grow in a suboptimal way, becoming lanky and weak, with insufficient flower production. On the other hand, those that receive a good amount of sunlight throughout their growth will be strong, bushy, and yield a very good harvest, if cared for properly. We're talking about something like 10 to 12 hours of direct light per day. If that's not possible, even around 6 hours of light can be decent (rough estimate).
Another thing to keep in mind is that in recent years, our country has been experiencing hotter summers, which adds a bit of complexity to the matter. While having the most light possible for the plants is always desirable, extremely high temperatures can also be an additional risk, and you need to be careful so that the plants don't suffer too much or we lose one along the way. Also, due to the Earth's position, daylight hours vary according to seasonal changes, something to keep in mind when planning.
The substrate
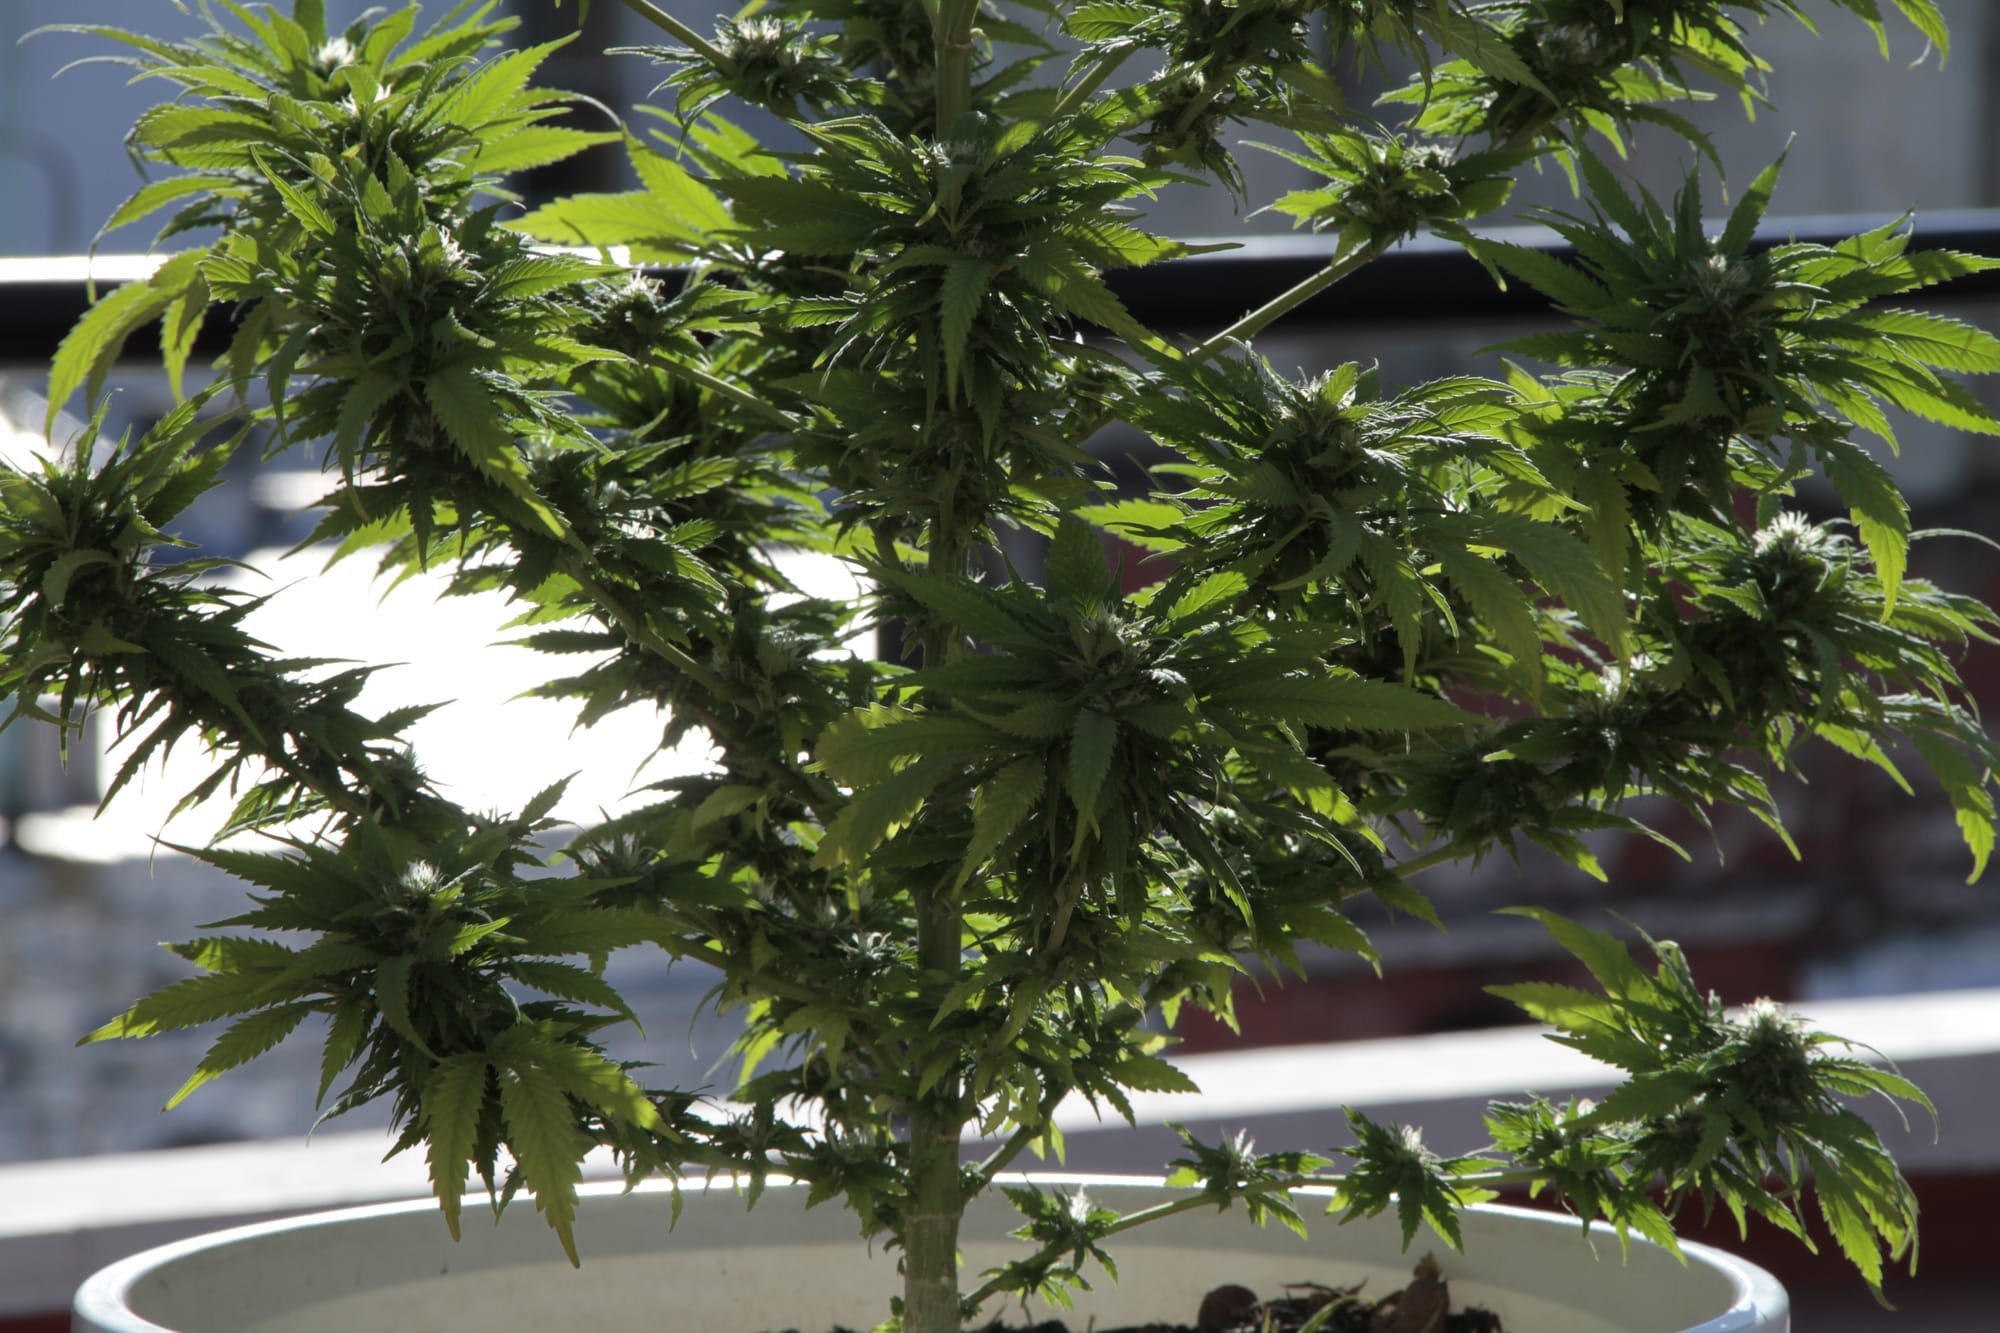
The next thing we'll determine is whether the plant goes into a pot or straight into the ground. For the second option, the main factor is the condition of the soil. Generally, house gardens tend to have soil that's somewhat compacted over time from being walked on a lot, and sometimes lacking in nutrients. If that's the case, working the soil a bit before placing our plant can help. Because, despite everything, the ground is always the best place. The difference between potted plants and plants in the ground, at least in terms of size, bud yield, and so on, is always quite significant.
I never had the pleasure of being able to do that, so I always went with the other option: pots. Sizes are usually measured in liters, and the most common ones at garden centers are 20, 25, 30, 40, and 60 liters. This will determine the size of our plants. Think of the pot size in proportion to the available space and the number of plants you want to have.
Most of the plant's growth depends on how developed its root system is, which is why the more soil available, the more roots, and the better the result. In general terms, the goal is to achieve a substrate with a sufficient amount of nutrients, well-aerated for optimal root growth, and that doesn't compact over the months. That's why we don't talk about just "soil" but rather substrate, which has several components besides regular dirt.
There are thousands of mixes with different components, but this is the one I use, based on the formula my friend Paco gave me — master jedi of growing and spiritual guide of this young padawan. The golden ratio is: 40% fertile soil or compost, 25% worm castings, 20% perlite, 15% peat moss (white or black). Keep in mind that one liter of pot equals one cubic decimeter (1L = dm3) of substrate, which is the unit usually used to measure soil volumes at garden centers. The math is adaptable for any size using a simple rule of three.
For preparing the substrate, the best approach is to dump all the components on the floor or in a pot big enough to mix everything well so it reaches optimal homogeneity.
You can also buy pre-made substrates. The difference is convenience versus cost: they're more expensive but save work. In my case, I had good results in size and yield with both Klasman Dynamics TS3 and Grow Mix Multipro, but I haven't used them enough to have a conclusive comparison. The price difference between the two makes me lean toward Growmix.
Also remember that while preparing the substrate is the right time to add some supplements that will serve as food for the plant, from bone meal to bat guano. There's a whole variety of soil supplements, and then there are fertilizers that are added through watering.
Fertilizers
The debate about whether to use organic or inorganic fertilizers and pesticides is as old as time. That is, whether they should be made from materials extracted from nature or from pure synthesized chemical compounds. I've always leaned toward organic, but I never really knew if one is better than the other. Among the supposed advantages of organics is better substrate development (microorganisms that enrich the soil can inhabit it), better nutrient absorption, and better plant growth. But here, everyone should do their own research. Out of habit, I keep using organics with more than satisfactory results in terms of quantity and quality of the flowers obtained.
Then, we need to keep in mind that there are fertilizers that can be incorporated during the soil preparation, where supplements can be added to the mix to provide what's needed for growth in both vegetative and flowering stages. At this stage, I usually use bone meal and recently I've added bat guano — both easy to find at garden centers or grow shops. And then there are additional moments to fertilize during the plant's growth, where we introduce nutrients through watering.
The cannabis plant has two very distinct stages, related to the maturation time of each strain and the number of hours of light it's exposed to. While it vegetates, stems, leaves, and roots grow. Then, when it enters flowering, the buds appear and all growth concentrates there. Accompanying each stage of the process with the right nutrition is key. And, in my experience, it positively results in bigger and healthier plants, and denser, fatter buds with more crystals.
In very general terms, the marijuana plant feeds on a triad known as N-P-K: nitrogen (N), phosphorus (P), and potassium (K). The main component for vegetative growth is nitrogen, and for flowering it's potassium. That's why the different supplements for each stage have more of one than the other, as appropriate.
In my case, I've tried two very popular and widely available fertilizer lines: Vamp and Top Crop, both local brands. There are better supplements out there, but this is a basic starting point to get the hang of things. Vamp is a commercial version of bat guano, with products for vegetative and flowering stages. Top Crop also has its Vegetative line and its flowering products: Top Bloom (which feeds the plant) and Top Candy (which fattens the buds).
Application should always follow the instructions. Always being careful not to overdo it and damage the plant. Over-fertilization is usually noticeable on the leaves, with spots, strange colors, or burns. The best approach is to always respect the proportions suggested by the manufacturers and water in a way that allows the water to drain out through the bottom of the pot.
Watering
If there's one thing I discovered over the years of growing, it's the importance of proper watering. Basically, you need to maintain a more or less constant level of moisture in the soil, never letting it dry out completely so the plant doesn't suffer stress and lose growth days. The most important thing is to water with chlorine-free water. This can be achieved by letting the chlorine evaporate (it takes about 48 hours) or by using a dechlorinator, which isn't highly recommended, but I still use it quite a bit and never had a problem.
How do you know how much to water? They say about 10% of the pot size. Either way, I always water to keep the soil moist but not soaked. One way to check is to stick your finger in — if the soil is moist within the first centimeter, it's still good. In my last grow, this is how I got the plants to grow better. In previous grows, I'd very often let the soil dry out too much, until the leaves drooped, as if they were wilting. While it didn't kill the plant, it took days to recover its vigor and negatively impacted growth.
Now that we have a rough idea of all the factors involved in an outdoor grow, the time has come to put them into play.
Germination, vegetative stage, and transplanting
As for the right time to germinate, we're in the perfect month: September. During winter it's harder for them to germinate, but some people do it and it's possible. The risk is that the hours of light are insufficient or the temperatures are too cold, and the plant never gets into a good vegetative rhythm, never develops properly, or flowers as soon as it can. In many cases, the plant is grown indoors from September to December and brought outside in December when it already has a pretty decent size.
For germinating, I used to use the "flying saucer" method, with two deep plates, one facing up and the other facing down. Inside the bottom one, place two napkins, sprinkle them with water, and put the seed on top; cover it with two more napkins, place the other plate on top, and leave it for several days, making sure it stays nicely moist. When the white root has emerged but it's still in seed form, transfer it to soil. There's also another germination method where you leave the seed in a glass of water and, as soon as the root appears, transfer it to soil. I haven't tried it yet, but they say it's more effective.
Once our seed has germinated, we need to transfer it to soil. The best approach is to plant it about a centimeter deep with the roots facing down, so the plant will seek the surface. You can germinate in a smaller pot and then transplant, or do it directly in the final pot — this depends on several things, but generally with feminized non-autoflowering plants, transplanting can be done without problems.
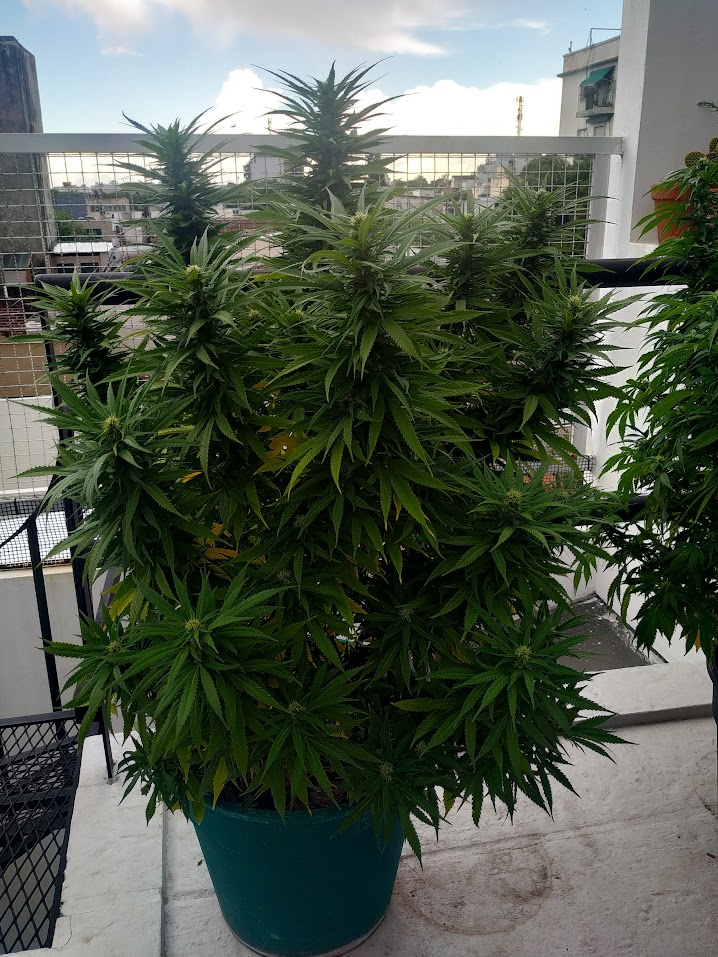
Flowering and harvest time
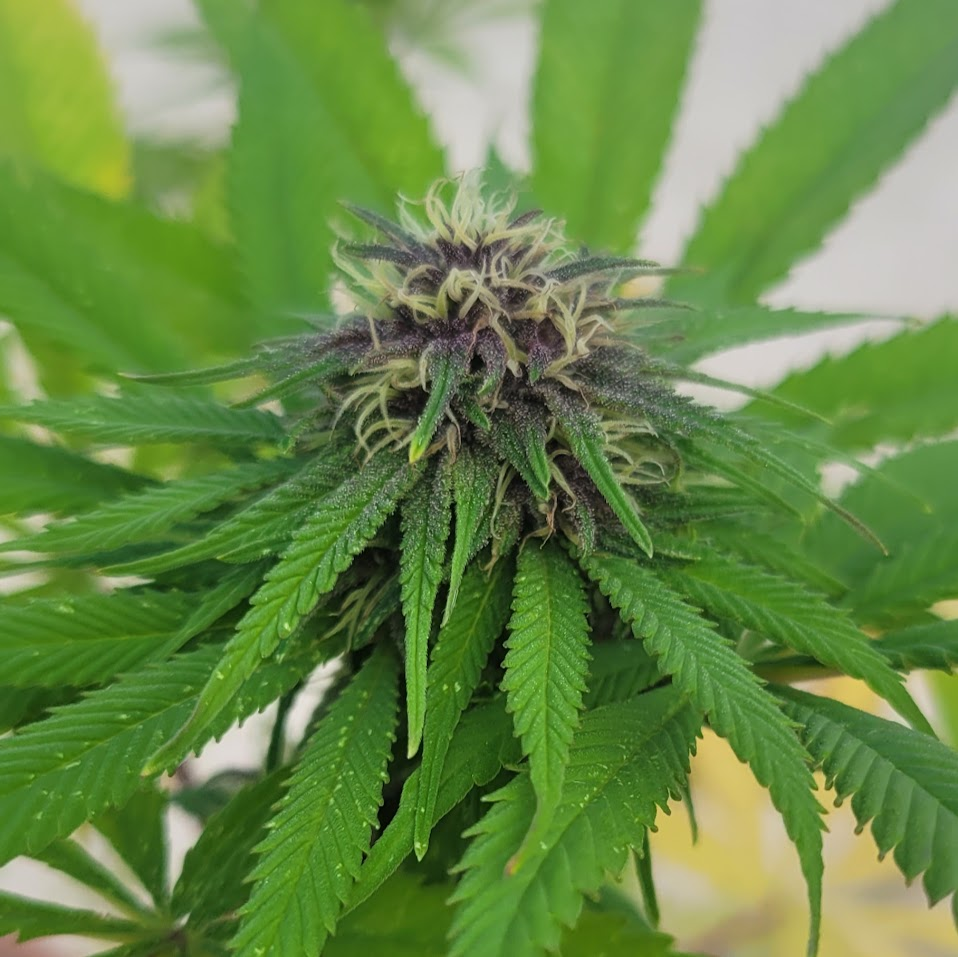
Changes in the light regime induce photoperiodic plants to flower, which is easily detected through observation, when the famous "white hairs" appear that mark the birth of the flowers. During the first days of flowering, the plant goes through a growth spurt, but then it concentrates its efforts on feeding the flowers, swelling its calyxes, and producing the crystals that are, ultimately, what contain the plant's psychoactive substances. The more crystals, the stronger the effect.
Keep in mind that, depending on whether it's a sativa-dominant or indica-dominant strain, flowering usually begins in late February or mid-March, and can extend into May for late-flowering plants. In any case, once the plant has completed its growth journey and is mature, we can harvest it.
Regarding the harvest time, there are many opinions, but what's usually done is to examine the trichomes with a jeweler's loupe. They tend to oxidize over time, and some suggest cutting when they have an amber color, others when the color is more "milky," and others when oxidation hasn't occurred and they're still transparent.
Despite the different opinions, which also have to do with different desired effects, a while back I found a study published by the United Nations that suggests that the less oxidized the trichomes are, the stronger the high will be. But this depends on each grower. Keeping in mind that flowering can last between 4 and 8 weeks, it's good to pay attention to choose the right harvest time.
After cutting the plant comes the process of drying, trimming, and curing. But I think that's a topic for another guide. See you next time!